 Configure Microsoft SQL Server Express for Multiuser Environments
Provided by the FMS Development Team
Introduction to Microsoft SQL Express
SQL Express is the free version of Microsoft SQL Server that supports databases up to 10 GB. For more information on SQL Express and how it differs from other editions, visit our Microsoft SQL Express page.
SQL Express Can Provide Databases Across Your Network
SQL Express is most commonly installed on a PC to provide database for applications running on that PC. Fortunately, it can also provide databases used by other PCs, subject to the limitations of the SQL Express edition. Follow our instructions below on configuring SQL Express to provide a free SQL Server across your network.
Implementation
Open SQL Server Configuration Manager, which installs as part of SQL Express and enable TCP/IP for the SQL Express instance. The server needs to be trusted on the domain if you are going to use Windows Integrated security.
Note: SQL Configuration Manager is different from Microsoft SQL Server Management Studio (SSMS). You can launch it by running: SQLServerManager15.msc, where 15 is the version number (for SQL Server 2019). For more information, visit Microsoft's webpage SQL Server Configuration Manager.
Open the 'Run' dialog box by clicking the [Windows Logo Key]
 + [R] key.
Type the following: SQLServerManager15.msc and click [OK].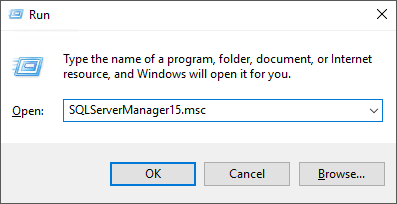
In the left section, select 'SQL Server Network Configuration' and click 'Protocols for SQLEXPRESS'.
Double-click on the 'TCP/IP'.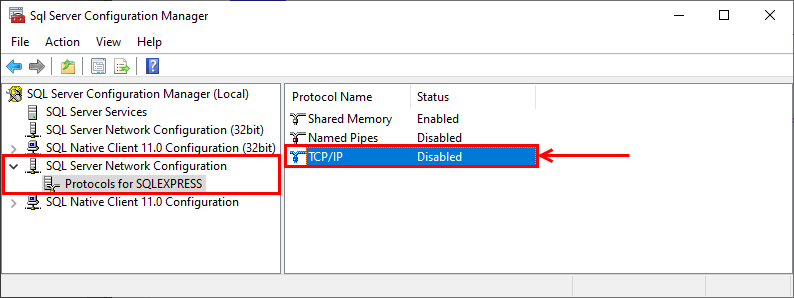
Set 'Enabled' to 'Yes' and click [Apply].
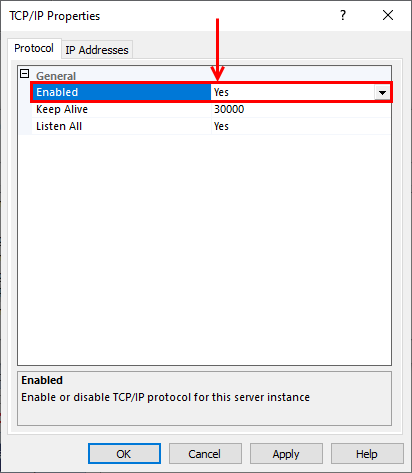
The following message will appear, click [OK].

Switch to the 'IP Addresses' tab. In the IPAll section, copy and paste the value from TCP Dynamic Ports to TCP Port and click [Apply].
Note: The port number may differ from the port in the below screenshot. If the Dynamic Port is 0, delete the value and enter a 5-digit number for the TCP Port.
Make a note of the port number.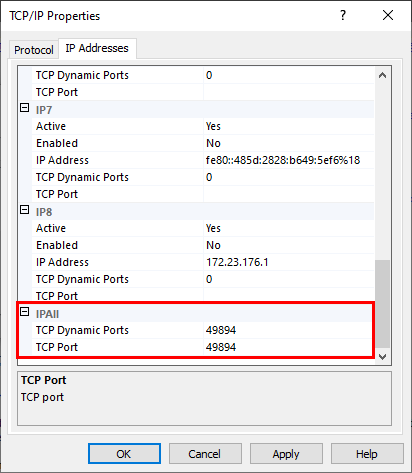
The following message will appear, click [OK].

The service can be restarted by selecting the first item in the left section called 'SQL Server Services'.
In the right panel, right-click the service that was changed, and select [Restart].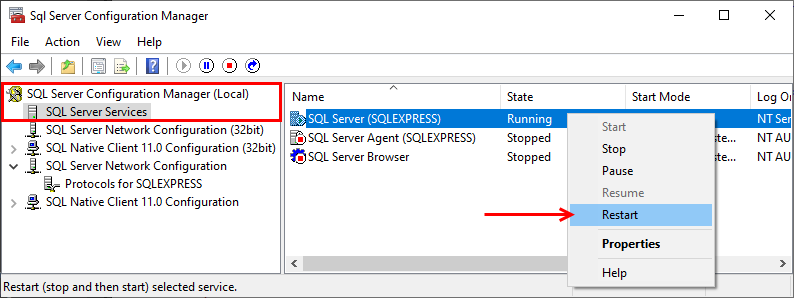
In the Windows Search bar, type 'Windows Defender Firewall' and open the program.

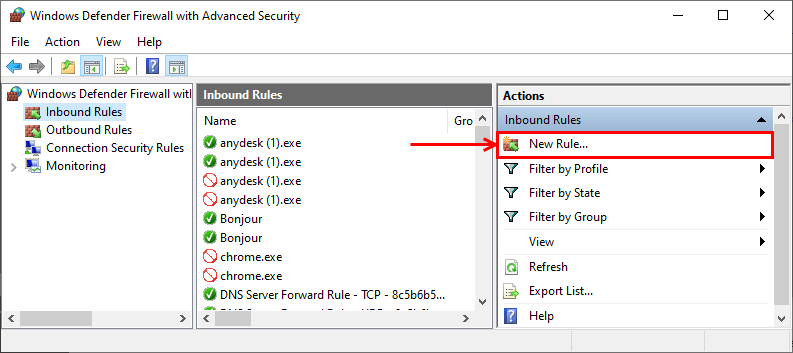
Select 'Advanced Setting' > [Inbound Rules] and click [New Rule...].
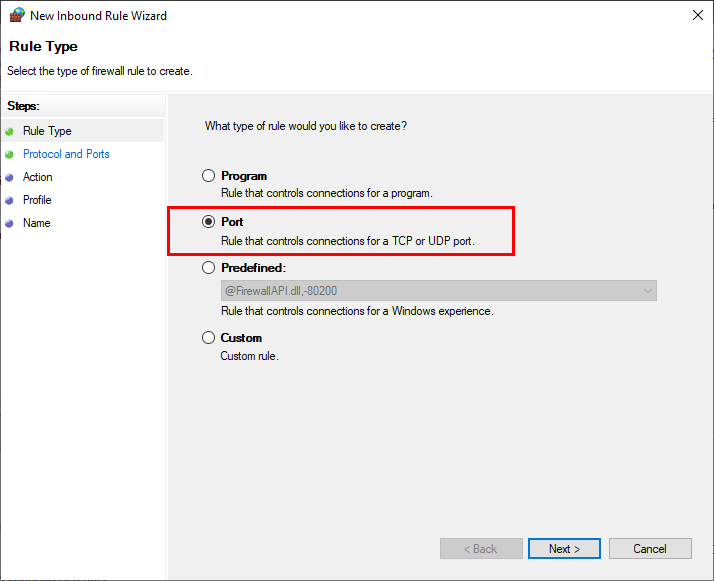
Select Port as the Rule Type and select [Next].
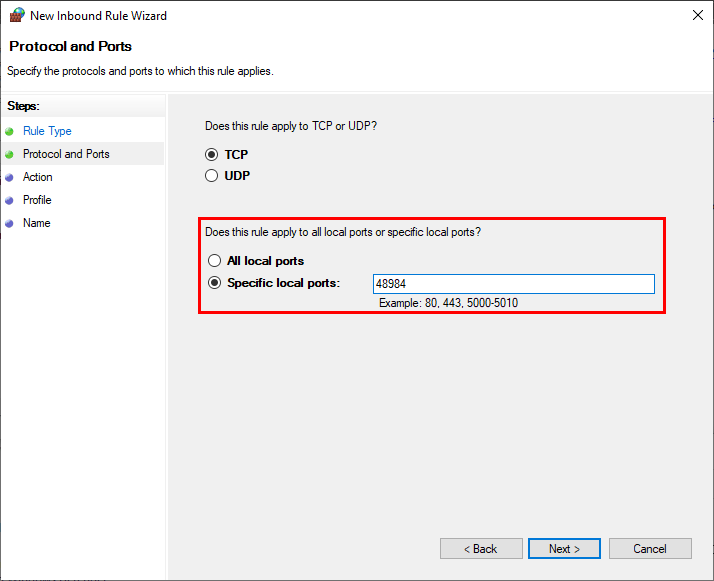
Select 'Specific Local Ports' and enter the TCP port number you previously noted. Click [Next].
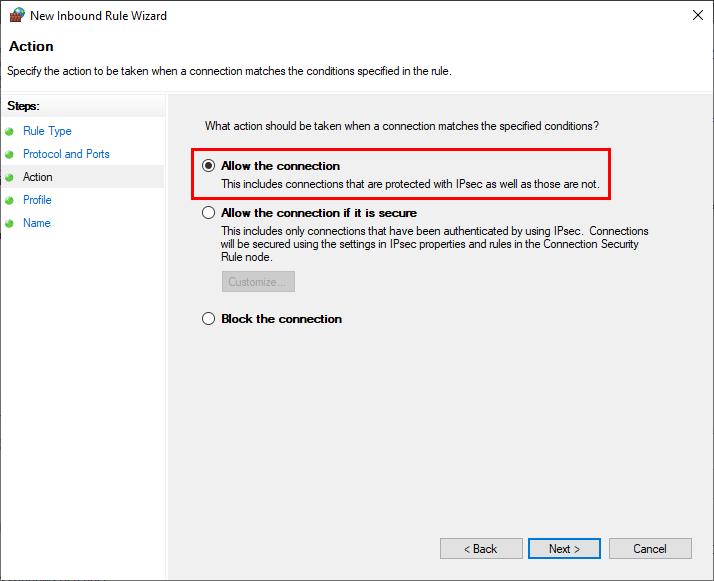
Select 'Allow the Connection' and click [Next].
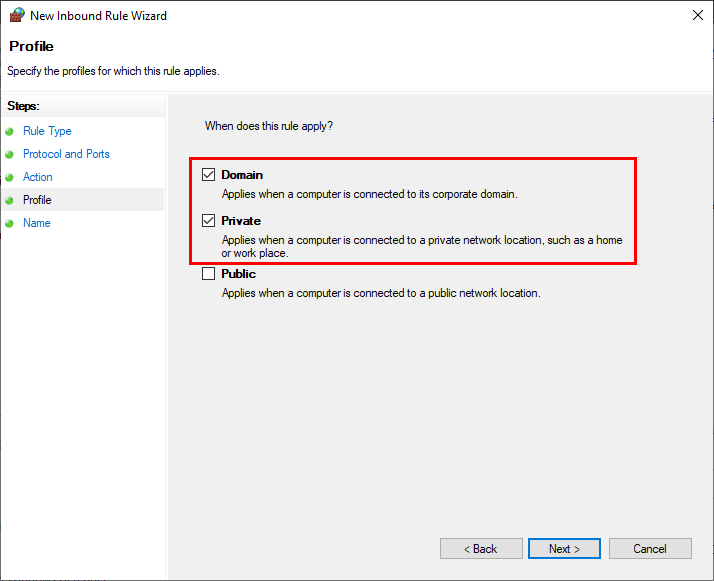
Select 'Domain' and 'Private' that the rule applies to and click [Next].
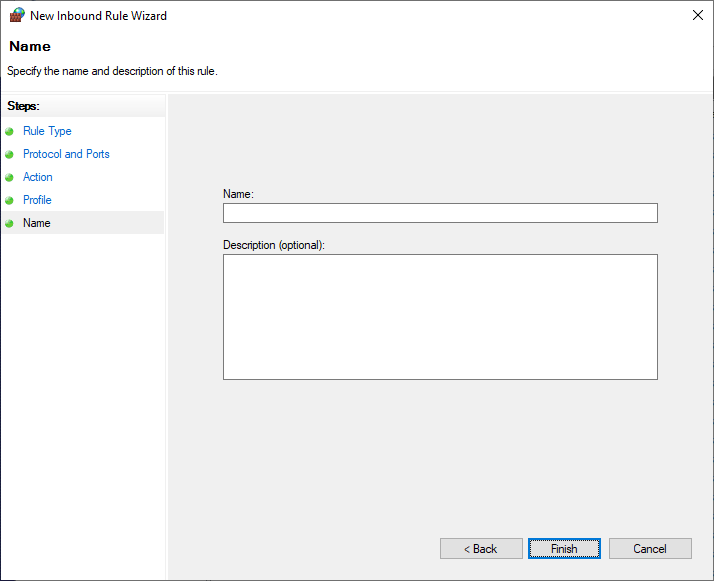
Name the rule and click [Finish].
Strategic Overview
SQL Server Security
SQL Azure Cloud
What it Means to Information Workers
Link Microsoft Access to SQL Azure Databases
Deploy MS Access DBs linked to SQL Azure
Monitor SQL Server Usage and DTU Limits on Azure
Convert Azure SQL Server to Elastic Pools
SQL Server Tips
Database Backup and Restore on Network
SQL Server Express
SQL Server Express Editions and Downloads
SQL Server Express Automated Backups
Videos
Migrate Your Data Tier to SQL Server: Strategies for Survival
Microsoft Access Database and Migration Challenges
Are we there yet? Successfully navigating the bumpy road from Access to SQL Server
Services
Microsoft SQL Server Consulting Services
Visual Studio .NET programmers for web development
General Microsoft Access consulting services
Additional Resources
Microsoft Access Developer Help Center
MS Access Developer Programming
Connect with Us
 Email Newsletter
 Facebook
 X/Twitter

